SSR Security Scope
This section provides high level descriptions of the security functions and mechanisms of the SSR for Common Criteria Compliance.
Security Audit
The SSR provides an audit function to gather a rich set of detailed audit records of all critical security operations. Audit records are log entries which include necessary data pertinent to the event, allowing detailed analysis of the audit records. These records are protected against unauthorized modification and may be transferred to an audit server for storage and further analysis. The transfer of the audit records to the audit server is protected by SSH.
Cryptography
The SSR implements cryptographic functions allowing secure communication with external devices. The SSR implements a random bit generator to generate cryptographic keys, key agreement mechanisms, public key cryptographic functions, symmetric cryptographic functions, secure hash functions, and keyed hash-based MAC functions providing protection of data and communication. Cryptographic keys and Critical Security Parameters (CSP) are destroyed by the SSR when no longer required.
All cryptographic algorithms are validated through the Cryptographic Algorithm Validation Program (CAVP) to ensure correct functioning.
SSH
The SSR implements an SSH Client and an SSH Server for secure communication between the SSR and external devices such as an audit server or remote management device. Communication between the SSR and external devices uses Port 22. The SSR implements public-key based authentication between itself and other devices. The public keys are stored in key containers. The SSR does not implement X.509 certificate-based authentication mechanisms. Once the SSH connection between the SSR and a remote management device is established, the user is authenticated with a username and password.
The Command Line Interface (CLI) is used for the management of the SSR. The CLI may be accessed by successfully authenticated Administrators locally from console, or remotely over SSH. Once authenticated, the Administrator uses the Conductor to manage one or more SSRs (routers). Management communication is also protected by SSH.
Platform Management
Common Criteria-compliant platform management is performed by the administrator from the CLI on the Conductor. While there are other methods of SSR management, use of the CLI is the only compliant method for managing the SSR. The CLI is accessed locally from console, or remotely over an SSH connection.
Identification, Authentication, and Access Management
Each user is identified with a username and password, and upon successful verification of the password, a user is assigned to a role defined in the user configuration. Users are allowed to change their passwords within the parameters defined on the SSR. The passwords are stored in a secure file preventing unauthorized access. Passwords entered remotely are not echoed to ensure unauthorized parties may not learn passwords of legitimate Administrators.
Each user may terminate their own session. The SSR also maintains an inactivity timer for each user. When the administrator-defined limit is reached, the SSR terminates that session. The inactivity timer applies to all CLI and shell sessions, regardless of whether they are local or SSH connections. Use the following command to configure the timeout value (in seconds):
configure authority router system inactivity-timer 60
Additionally, a counter records unsuccessful consecutive authentication attempts for local and remote users. Protective action is taken when the defined maximum value is exceeded. The Authentication window can be configured to display a banner informing the users of the sensitive nature of the SSR, and of the sanctions resulting from misuse or abuse of the SSR.
SSR Protection
The SSR is protected from tampering and unauthorized access by both active and passive means.
- Active Measures: These are the security measures that ensure that SSR data and functions are not accessible to unauthorized users. These include:
- Self-tests at boot, or when requested by an administrator, to assert correct functioning of the cryptographic functions.
- NTP synchronization producing reliable timestamps.
- Secure storage of passwords, cryptographic keys and CSPs.
- Managing firewall rule inspection to ensure that the previously processed traffic information does not influence the next filtering decisions.
- Secure upgrade process for the SSR software and verification of the authenticity of the upgrade prior to installing it.
- Passive Measures: These are the design characteristics of the SSR that minimize the attack surface accessible to threat agents. The minimization of the attack surface is achieved by the SSR software running on a dedicated hardware platform, with a minimum set of physical ports and connections, implementing only the necessary functions for the SSR.
- There are no general computing capabilities available to the users of the SSR. The SSR is not a general purpose device, no other software shall be installed or operated on the device.
Firewall
The SSR implements a packet filtering firewall which allows you to define rules for filtering traffic. The rules may be defined for specific traffic or all traffic.
When Firewall filtering rules are defined, only the traffic identified in the traffic filtering rules is filtered. All other traffic is allowed. If no firewall rules are configured, traffic flows normally subject to the SSR configuration.
Firewall rules may be applied to each network interface separately, and are applied in the order defined by the user. The SSR follows the rule base for each network connection and implements the first rule that matches the traffic. The SSR inspects each packet independently, and no residual information for previously inspected packets influences the inspection.
Security Events
System Crashes
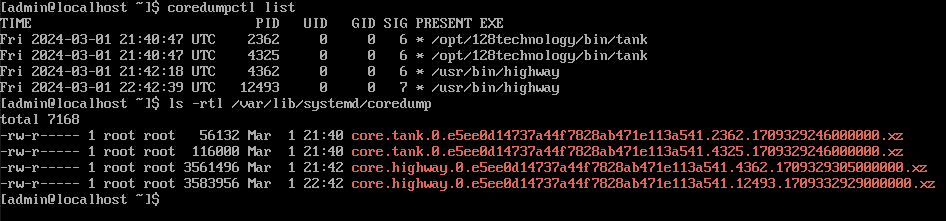
The SSR processManager automatically restarts the failed processes based on system policy. Core files should be considered to contain customer confidential data and be handled with appropriate security. Core files are stored in /var/lib/system/coredump and can be removed by the administrator if not required.
$ sudo rm -f /var/lib/system/coredump/core*
The coredumpctl list command is used from the Linux shell to display crash history from the system journal.
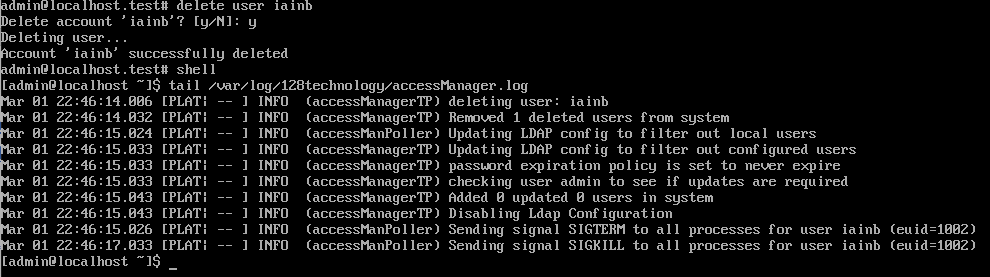
Updates to User Accounts
When a user account is added, changed, or deleted, a security event is recorded in accessManager.log. This is for information only; no further action is required by the administrator.
Audit Trail Overflow
The Auditd retention policy is configured for 8MB logs, with five copies. When audit logs exceed 8MB, the current log file will be closed and a new file opened. After 5 files have been rotated in this manner, the oldest file will be deleted. No further action is required by the administrator.
A disk space remaining action is configured and set to 100MB. If the system disk contains less than 100MB free space a warning message is written in syslog allowing the administrator to take recovery steps as required. Recovery steps include transfer of the audit logs off of the system, or removing non-critical files such as core dumps to free sufficient space on the disk. If the warning is ignored, the disk may eventually fill completely, impacting SSR service.
The system configuration disk-full-action is set to halt. The system shuts down when audit logs can no longer be written due to disk space being exhausted. Recovery requires manual intervention during the boot process, allowing you to temporarily start the system in single-user maintenance mode with audit disabled. At this time stale files can be deleted from the disk.
If the system halted due to audit disk full, proceed as follows:
- Connect to the serial console port.
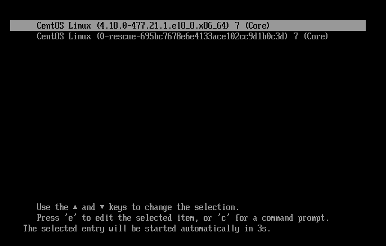
- Boot the system.
- During the GRUB2 boot menu countdown, press
eto edit.
- Scroll down and append
audit=0 Sto the end of the vmlinuz kernel line.
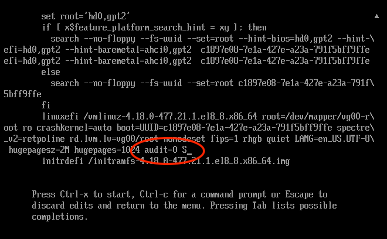
- Press Ctrl-x to boot the system into Single User mode.
- Enter the root password when prompted, to access maintenance mode.
- Remove stale logs and crash dump files to free space on the disk.
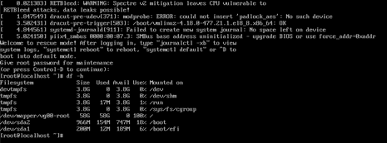
- When complete, type
rebootto boot back into normal SSR service.
When you modify the GRUB kernel behavior by editing the GRUB menu at boot time, the changes do not persist over a system reboot. Default boot behavior is restored the next time you boot the system.