Whitebox Staging
Beginning with version 6.0, WAN Assurance for the SSR is available for users who manage their network using the Mist Cloud. This document describes the process to download an image and onboard a whitebox - a non-Juniper hardware device, that is either certified by Juniper, or Juniper approved, self-evaluated device.
The Mist-redirect ZTP process for Conductor-managed deployments is only supported on Juniper branded hardware devices - SSR1x0/1x00.
This process also assumes that you have the Mist Cloud configured and currently managing your network.
The installation consists of the following steps:
- Staging
- Installation
- Default Port Identification
- Associate the Device with Mist Using the GUI
- OR
- Adopt the device using the PCLI
Staging
Prepare your system for installation - appliance installation and power up - per the hardware installation instructions provided with the system.
Download
The image-based ISO's are available to download at the following location:
The package-based ISOs for Conductor-managed deployments are available to download at the following location:
You will be prompted for your username and token to access the web page listing the software versions. Download is done directly from the page. For the detailed download process, see Downloading an ISO.
Create a Bootable USB
Use the instructions Creating a Bootable ISO to create a USB to be used to install the image.
Installation
-
Insert the flash drive into the appliance, and boot into the flash drive.
-
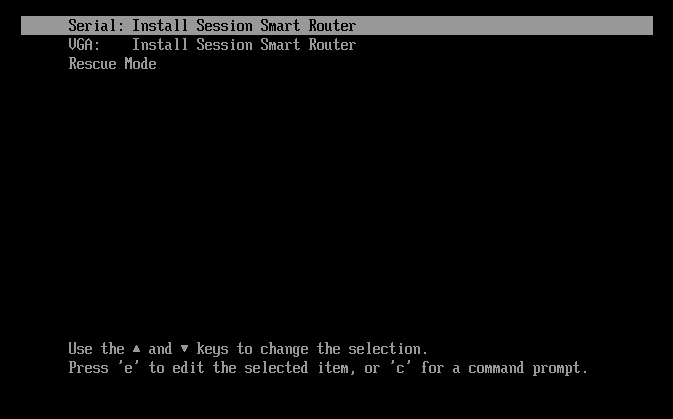
Select the installation methods; Serial Console or VGA. If you do not make a selection, the Serial mode installation is selected by default.
-
In the Installer window, select 2 for the ZTP Install Mode. This is the default mode for image-based installation.
When using the image-based 6.0 installation, be aware that if Interactive Install is selected, intialize128t does not launch automatically on first boot. This must be run manually; log in to the console as root using the default credentials, and type initialize128t to perform interactive initialization. This will be resolved in a future release.
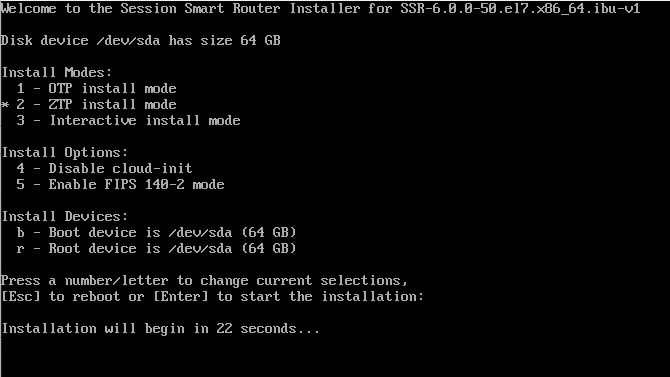
On a system with multiple disks, the Install Devices selection allows you to steer the boot and root filesystems to individual devices if necessary.
-
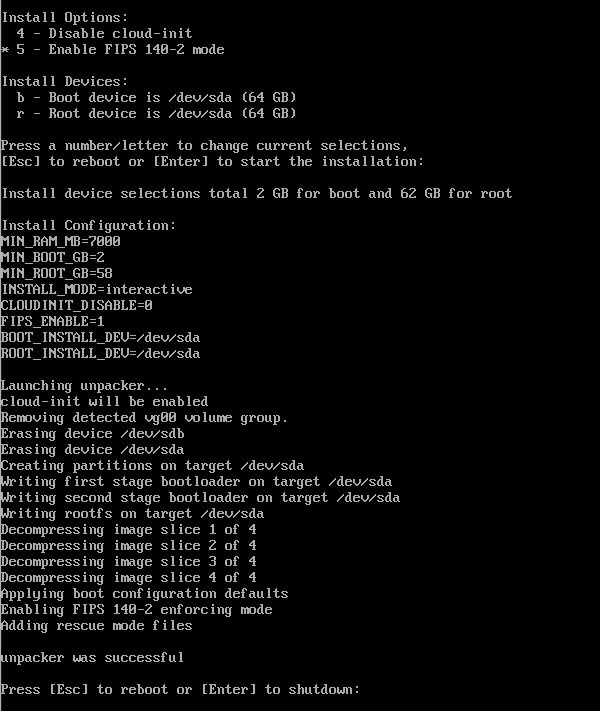
If you require FIPS enforcement, select 5 for
Enable FIPS 140-2 mode. If you do not require FIPS enforcement, skip to step 7.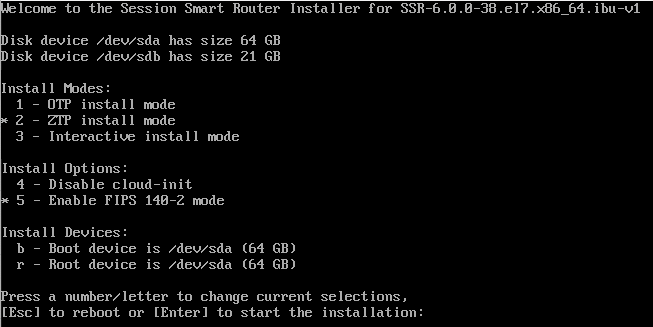
-
The resulting system boots into FIPS 140-2 enforcing mode.
-
Verify FIPS mode is active by reading the kernel crypto state using
sysctl. The result is an error when attempting to use a non-FIPS compliant crypto such as md5.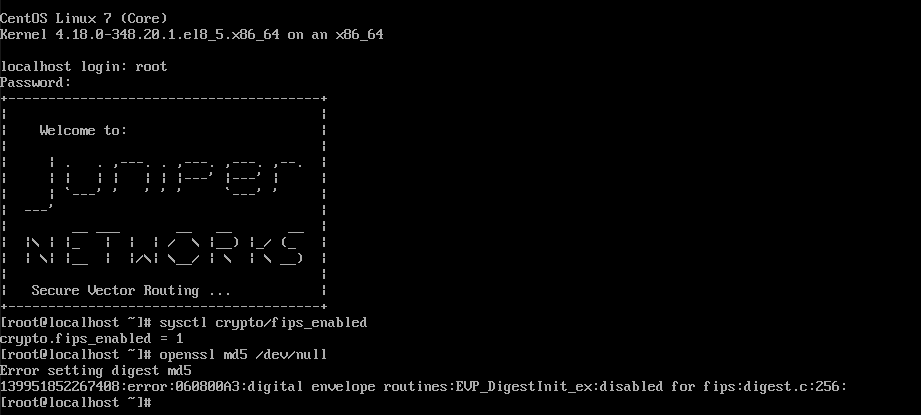
-
Press the enter key to start the installation.
-
Once complete, you are prompted with an option to press Esc to reboot immediately, or Enter to shutdown and continue later.
-
Upon restart, the system initializes and is internet ready. Since each manufacturer's device port layout is different, use the Device Default Port Layout to identify the port layout of the device to complete the onboarding process.