WAN Edge Templates
So far you have an SSR device waiting to be claimed, a network for your LAN, and an Internet
application for your WAN to deliver.
A WAN Edge template ties them all together! The use of templates allow for re-usable and consistent configuration for every SSR device you deploy.
- Navigate back to the WAN section of the organization sidebar menu, and select WAN Edge Templates.
- Select Create Template in the upper right.
- Name the template.
- Click
Create
. - Enter NTP and DNS information to be used by the WAN edge device.
WAN
The first thing to do in your template is to describe which port to use for the WAN.
- Scroll to the WAN section of the template, and select Add WAN.
- Name the WAN port
wan1
. - Since you already plugged port 0 on the device into the Internet, enter
ge-0/0/0
to designate it as a WAN port. - Make sure IP Configuration is set to be learned from DHCP, and that Source NAT is enabled.
- Click
Add
at the bottom of the Edit WAN Configuration side panel.
LAN
Next, associate your LAN network segment with the appropriate port on the device, and give the LAN additional network services such as DHCP.
- Scroll to the LAN section of the template, and select Add LAN.
- From the Network dropdown menu, select your network segment to associate it with the LAN.
- Enter the port used for the LAN port, for example
ge-0/0/3
. - In the IP Address setting, enter
192.168.1.1
to assign the WAN edge device.1
for use as gateway in the network. - Enter
/24
for the Prefix Length.
- To provide DHCP services to endpoints on this network, select the button for DHCP server.
- Give your DHCP server an address pool starting with
192.168.1.100
and ending with192.168.1.200
. - Enter
192.168.1.1
as the Gateway to be assigned to DHCP clients. - Finally, enter
1.1.1.1,8.8.8.8
as DNS Servers to be assigned to clients on the network. - Click
Add
at the bottom of the Edit LAN Configuration side panel.
Policy
Your template has WANs and LANs; now you need to tell the device how to use them to connect users to applications. This is done using Traffic Steering and Application Policies.
Steering Policy
- Scroll to the Traffic Steering section of the template, and select Add Traffic Steering.
- Name your steering policy, for example,
local-breakout
. - Select Add Paths to give your steering policy a path to send traffic.
- Select
WAN
as the path type, and select your WAN interface. For apps that use the policy, this indicates you want them sent directly out of the local WAN interface. - Click the check in the upper right of the Add Path box, and then click
Add
at the bottom of the Add Traffic Steering side panel.
Application Policy
Finally, tie your networks and applications together in an application policy.
- Scroll to the Application Policy section of the template, and select Add Policy.
- Enter a string in the name column, and click the check to the right of your entry.
- From the Network column dropdown, select your LAN network.
- From the Applications column dropdown, select your Internet app.
- From the Traffic Steering column dropdown, select your local breakout steering policy.
Almost there! You now have a working WAN Edge template you can apply to many sites and devices across your organization.
Assign to Site
With your template set up, you need to save and assign it to the site where your WAN edge device will be deployed.
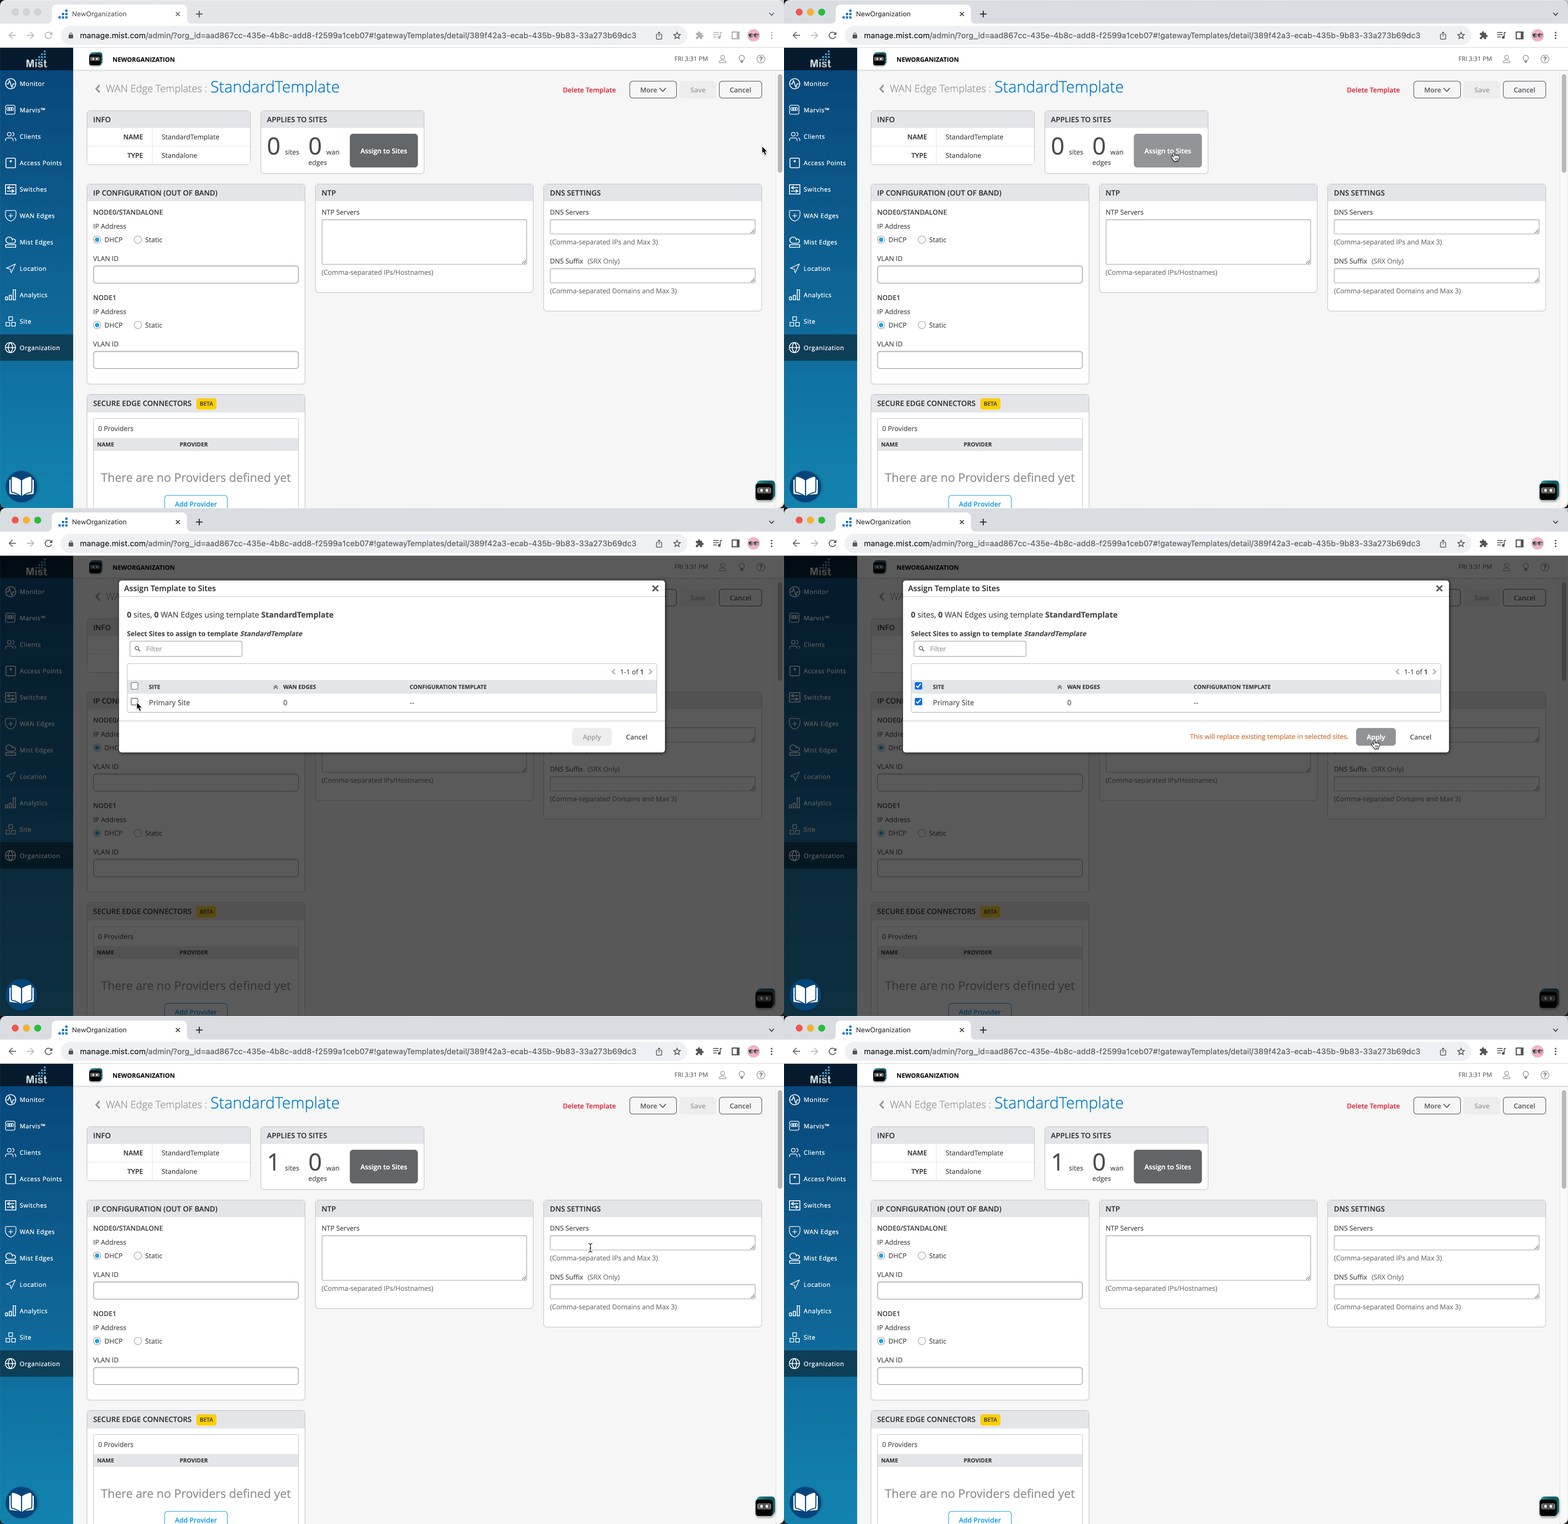
- Scroll to the top and click Save.
- Click the Assign to Site button, and select the site where you want the template config applied.
Great work! All that remains is to associate the device with a site.