Step 1: Create the Azure Conductor VM
This step deploys the BYOL Session Smart Conductor VM from the Azure Marketplace, using the Azure Marketplace Web Interface. The deployment template creates the VM, assigns a static public IP to the management interface, and configures a network security group. A cloud-init script installs SSR 7.1.4 and automatically initializes the node as a conductor.
Requirements
The following infrastructure must exist in your Azure subscription before deploying the conductor:
-
A VNet where the Conductor will be deployed (
SSR-VNetin this guide). -
A subnet within that VNet reachable via SSH and HTTPS for administration (
ssr-conductor-subnet). -
The subnet must be reachable from the WAN interface of every SSR router this conductor will manage.
-
A Managed Identity assigned the following minimum read permissions:
Microsoft.Compute/virtualMachines/readMicrosoft.Network/virtualNetworks/readMicrosoft.Network/networkInterfaces/read
Recommended VM Sizes
Select the instance size that best meets the scale of your deployment.
| Recommended Azure VM Size | Max vNICs | vCPU Cores | Memory |
|---|---|---|---|
| Standard_F8s_v2 | 4 | 8 | 16 GB |
| Standard_F16s_v2 | 4 | 16 | 32 GB |
| Standard_F32s_v2 | 8 | 32 | 64 GB |
| Standard_D8s_v5 | 4 | 8 | 32 GB |
For guidance on scaling the conductor for larger deployments, see System Requirements.
What the Template Creates
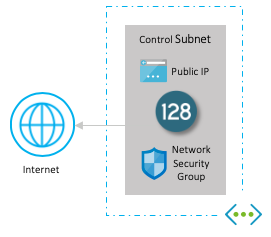
When you deploy the conductor using the BYOL template, Azure automatically creates:
- A VM using the BYOL Session Smart image from the Marketplace.
- A single network interface (
control) connected to the management subnet. - A network security group (NSG) associated with the control interface.
- A unique static public IP address assigned to the control interface.
The following image shows the resulting infrastructure:
Select the BYOL Plan
-
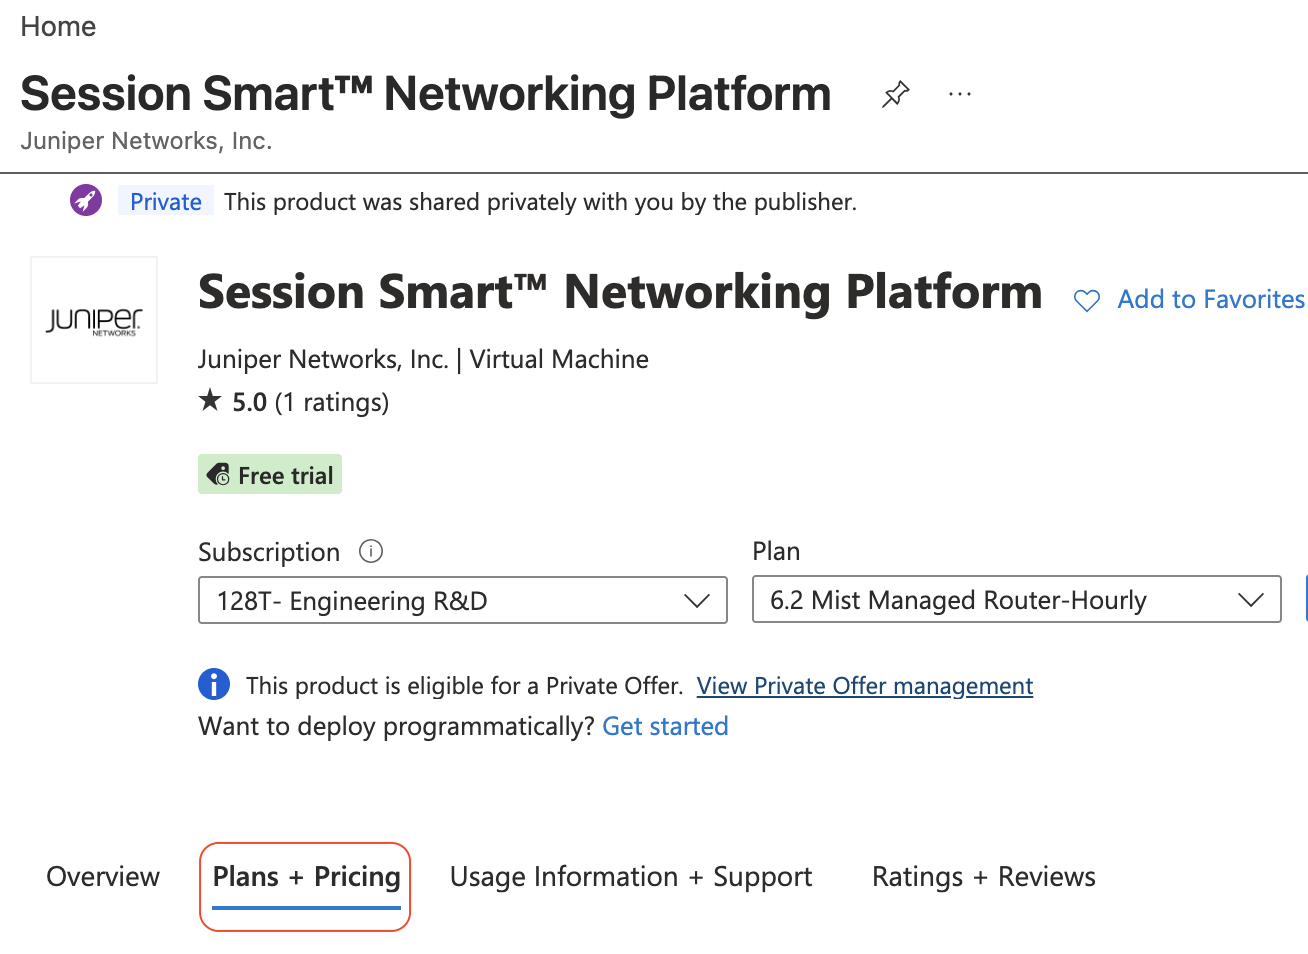
Go to the Session Smart Networking Platform in the Azure Marketplace.
-
Select the Plans + Pricing tab.
-
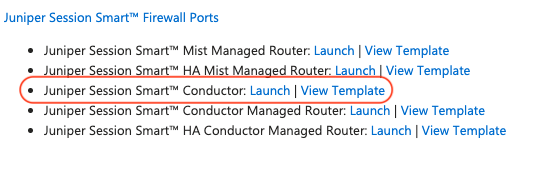
Scroll down to the bottom of the BYOL section.
-
Next to Juniper Session Smart Conductor, click Launch.
Deploy via Azure Portal
-
Fill in the template parameters using the following table.
Parameter Example Value Notes Subscription (your subscription) Subscription for the deployment. Resource Group SSR-RGSelect an existing Resource Group Location eastusThe Azure location where the VNet exists. One word, all lowercase (for example, eastus,westus,westeurope). See Azure locations.Availability Set Name Optional This is an optional parameter and should be left blank. Instance Size Standard_F8s_v2The Azure VM size to use for the conductor. Instance Name ConductorDisplay name for the conductor VM. SSR Version 7.1.4The BYOL version to install Artifactory Username (your username) User portion of the Juniper access credentials. Artifactory Token (your token) Token portion of the Juniper access credentials. Managed Identity (your managed identity) Must have the permissions listed in Requirements Virtual Network Name SSR-VNetSelect an existing VNet name. Control Subnet Name ssr-conductor-subnetThe conductor management subnet. Name of the management subnet within the VNet. Control Allowed CIDR 0.0.0.0/0Restrict to known source IPs after deployment. Source IP CIDR range allowed to reach the conductor control interface. Admin Allowed CIDR CIDR range allowed for SSH/HTTPS Source IP CIDR range x.x.x.x/32to reach the conductor for administration.Admin Public Key Data (contents of your SSH public key) RSA public key (at least 2048-bit) used to authenticate SSH access to the VM. SSH public key source Select Generate new key pair. If you have an existing public key, select the appropriate response and provide the key. If not, generate a new one the first time, and reuse the same key subsequent times. SSH Key Type Default is RSA SSH Format Key Pair Name (identifiable key pair name) Easily identifiable name for the key pair cautionAdmin Allowed CIDRaccess must be restricted to known source addresses prior to deployment. After the deployment completes and your environment is stable, update the associated NSG rules to restrict access forControl Allowed CIDRto known source addresses. -
Click Next. Azure will validate the input.

-
After reviewing the Terms, click Create.
-
When the deployment completes, open the Outputs tab.
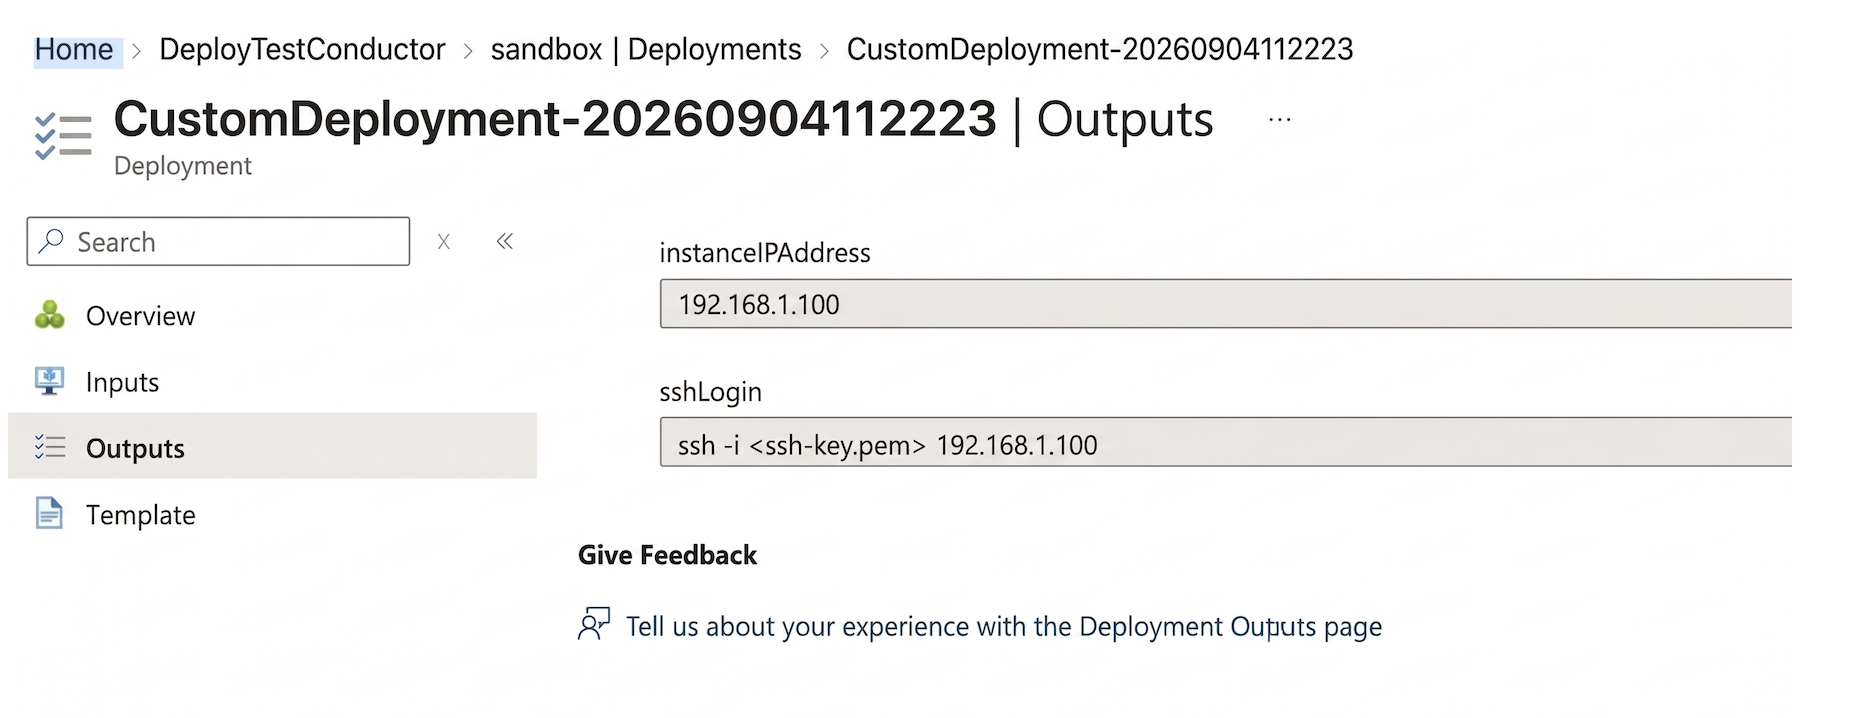
Make a note of the following values — you will need them in later steps:
- Public IP address assigned to the conductor management interface.
- SSH login command for the Linux VM.
importantLog in to the Linux instance via SSH using the default username
t128and the private key that corresponds to the public key supplied in Admin Public Key Data.When the deployment completes, the SSR 7.1.4 installation begins.
Next Step
Proceed to Step 2 — Initialize and Access the Conductor.