Step 3: Configure the Conductor
This step configures the authority-level settings on the conductor: the authority name, conductor address, corporate tenant, and internet service. These objects are shared across all routers managed by this conductor.
All steps are performed from the Conductor GUI at https://<conductor-public-ip> unless otherwise noted.
1. Assign the Conductor's Asset ID
Take this opportunity to log into the Conductor GUI to complete the following operations. This provides validation that the installation was successful, and familiarizes you with GUI operations.
Assign the Conductor's Asset
- Select the Conductor from the Authority menu on the left side of the GUI.
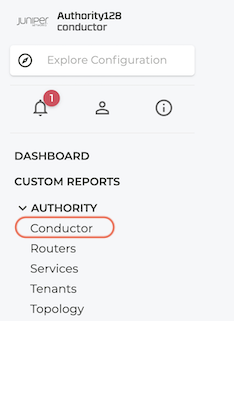
- Select the Configure icon.

- In the Node panel, under Associated Asset ID, select the hostname for the conductor.

- Validate and Commit the changes to the configuration.
2. Set the Authority Name
The authority represents the complete set of all SSRs managed under a single organizational entity.
-
Return to the Authority level - either select Authority from the configuration menu on the left side of the GUI, or select the up arrow next to Node at the top of the screen.

-
Select the Authority Settings.
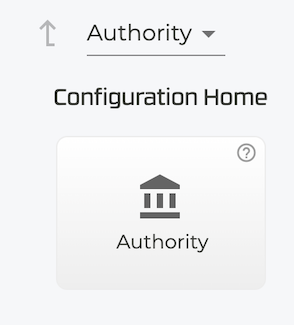
- Under Basic Information, enter the new Authority name.
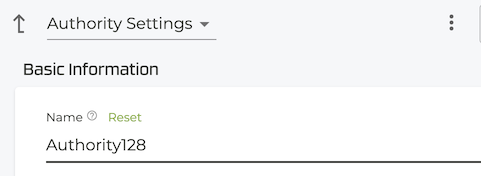
Use your organization's name as the authority name (for example, Authority128). The authority name cannot be changed after routers have been provisioned without re-onboarding them.
3. Set the Conductor Address
The conductor address is the IP that managed routers use to reach this conductor. For Azure deployments, use the public IP address assigned to the conductor VM so that routers outside the Azure VNet can also reach it.
If all managed routers reside in the same Azure VNet and communicate over private addressing, you may use the conductor's private IP (10.0.0.10 in this guide) instead.
- Under Conductor Addresses, select ADD.
- In the New Conductor Address window, enter the conductor public IP address,
192.168.100.10.
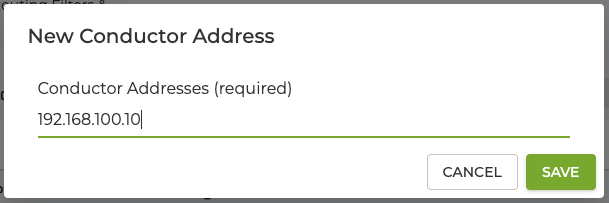
- Click Validate and Commit. Warnings will appear, advising you of the change.
The steps during initialization setup the management IP. The conductor IP address is the public IP address to which the managed routers connect. It is not necessary to manually associate this IP address with a network interface; the interactions between the SSR software and Linux will identify and assign the IP address to the network interface.
4. Create the Corporate Tenant
Tenants logically partition the network. The corp tenant represents corporate LAN users and is referenced by the LAN interface configuration on each managed router.
- In the Conductor GUI, select Configuration.
- Select Authority.
- Scroll to Tenants and select ADD.
- Enter the name
corpand select SAVE. - Select VALIDATE then COMMIT.
Tenants are authority-wide. A single corp tenant definition applies to all routers that assign it to a LAN interface.
5. Create the Internet-Traffic Service
The service configuration element defines the IP destinations that the SSR routes. This step creates a single service representing all internet-bound traffic from corporate LAN users.
- In the Conductor GUI, select Configuration.
- Select Authority from the left panel.
- Scroll down to Services and select ADD.
- Enter the name
Internet-Trafficand select SAVE. - On the Service screen, verify Enabled is set to
true. - Scroll down to Service Addresses and select ADD.
- Enter
0.0.0.0/0and select SAVE. - Scroll down to Access Policies and select ADD.
- Set Source to
corp. - Select SAVE.
- Set Source to
- Select VALIDATE then COMMIT.
What Was Configured
At the end of this step your authority contains:
| Name | Value | Description |
|---|---|---|
| Authority | Authority128 | SSR organizational authority name |
| Conductor Address | <auto-assigned> | Azure-assigned public IP — used for SSH, GUI, and as the conductor address |
| Tenant | corp | LAN-side user population |
| Service | Internet-Traffic | 0.0.0.0/0, access from corp |
The conductor is now ready to accept router onboarding.
Next Step
Congratulations, your Azure Conductor is deployed. The next step is to deploy your router(s) and onboard them to the conductor. See the appropriate router deployment guide for your needs.