Conductor High Availability for Cloud Deployments
This document describes the process for deploying a Highly Available Conductor in the AWS and Azure clouds. The procedure for deploying on Azure has additional steps performed using the Azure Portal. If you are installing on Azure, please refer to Using the Azure Portal before beginning.
Introduction
Juniper Networks is committed to providing the highest quality software with each release. As such, Critical Vulnerability Exposures (CVE) are continuously addressed, and security and administration best practices are enforced. Allowing SSH Root login has been identified as a significant vulnerability and has been mitigated. Additionally, all public cloud providers enforce SSH key-based authentication instead of password-based authentication. As a result of this stricter security posture, the process to deploy a Highly Available Conductor in the public cloud requires additional steps during the Initialization procedure. Use the following procedure to successfully deploy an HA Conductor in the cloud.
The process to deploy a highly available Conductor in the public cloud consists of the following steps:
- Launch two Session Smart Conductor VMs as described in the following links:
Click on the link of the public cloud provider where you want to perform the Session Smart Conductor HA deployment. In this document these Conductors are referred to as Node A and Node B respectively.
-
If you have selected the Hourly or Private AWS AMI or Azure Plan during step 1, then proceed to step 3. Otherwise, refer to Deploying the Primary Node Conductor – Node A to install the SSR software in Node A. When completed, proceed to step 4.
-
Initialize the primary node of Conductor as described in the section Configure Node A.
-
If you have selected the Hourly or Private AWS AMI or Azure Plan during step 1, then proceed to step 5. Otherwise, refer to Deploying the Primary Node Conductor – Node B to install the SSR software in Node B. When completed, proceed to step 6.
-
Initialize the secondary node of Conductor as described in the section Configure Node B.
Deploying the Primary Node Conductor – Node A
If the SSR software is not already installed on the Node A VM, launch the SSR installer using the command install128t and follow the Installation Procedure. After the installation is complete, the system will restart and the initializer will launch automatically.
If the software is already installed, launch the initializer from the command line using initialize128t.
Configure Node A
-
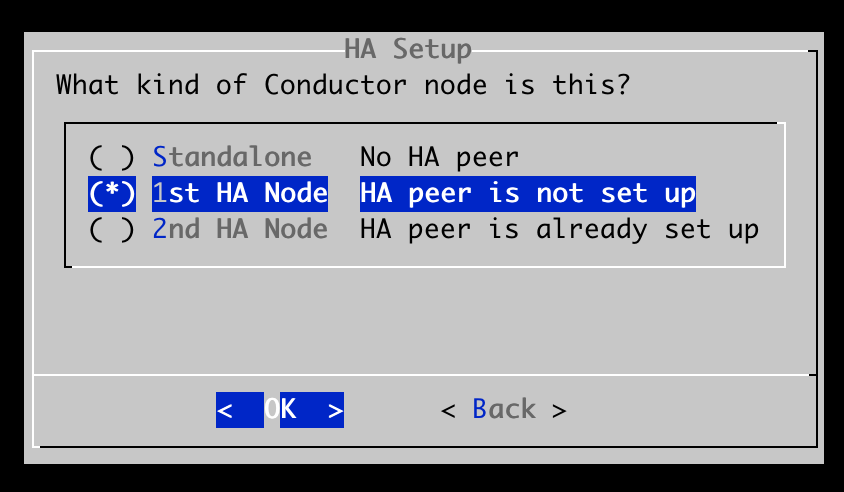
On the SSR Initializer Wizard, use the spacebar to select the Conductor role for the SSR node and press the Enter key to select OK.
-
To configure Node A, select 1st HA Node HA peer is not set up on the HA Setup screen, and OK.
-
Enter the IP address of Node A that will be used as the HA sync interface.
-
Continue with step 4 in the Initialize the SSR Node procedure. After the initialization is complete, reboot Node A as instructed.
Once Node A has rebooted, you must perform the following steps to configure SSH key-based authentication. Please note the commands vary depending on the public cloud provider.
-
Log in to the Node A VM via SSH and run the following commands, according to your public cloud provider.
- Azure:
sudo su -passwd <username of the VM> - AWS:
sudo su –passwd t128
When the password has been updated successfully the following message is displayed:
passwd: all authentication tokens updated successfullynoteDo not proceed to the next step until the password has been updated successfully.
- Azure:
-
After updating the password, perform the following commands.
mv /etc/sudoers.d/90-cloud-init-users /etc
visudo -f /etc/sudoers
- In the output of
visudo -f, verify the line%wheel ALL=(ALL) ALLis not prepended with a #. - In the output of
visudo -f, verify the line# %wheel ALL=(ALL) NOPASSWD: ALLis prepended with a #.
## Allows people in group wheel to run all commands
%wheel  ALL=(ALL) 	ALL
## Same thing without a password
# %wheel 	ALL=(ALL) 	NOPASSWD: ALL
Node A is now ready to allow access to Node B in order to form the HA pair. The user (t128 for AWS, or the user login for the Azure VM) has been set up in Node A to temporarily accept password-based authentication.
Deploying the Secondary Node Conductor – Node B
Log in to the Node B VM. If the SSR software is not already installed, launch the SSR installer using the command install128t and follow the Installation Procedure. After the installation is complete, the system will restart and the initializer will launch automatically.
If the software is already installed, launch the initializer from the command line using initialize128t.
-
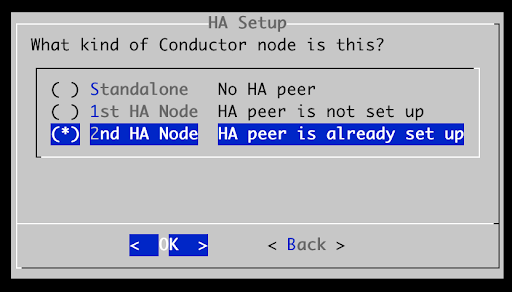
On the SSR Initializer Wizard, use the space bar to select the Conductor role for the SSR node and press the Enter key to select OK.
-
To configure Node B, select 2nd HA Node HA peer is already set up on the HA Setup screen, and OK.
-
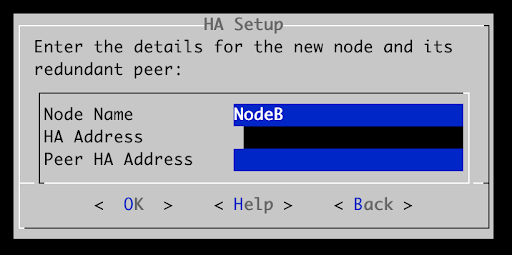
Enter the IP address for the HA Sync Interface on Node B in the HA Address field.
-
Enter the IP address for Node A in the Peer HA Address field.
-
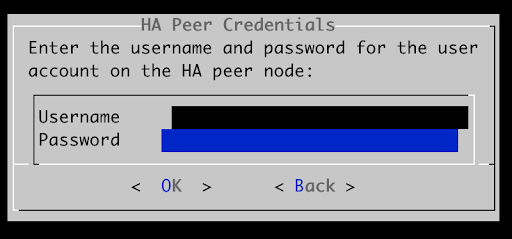
On the HA Peer Credentials screen, enter the username and password configured for Node A.
| Azure | Amazon Web Services - AWS |
|---|---|
| Username is (username of the VM) | Username is t128 |
- Select OK. Upon successful configuration, the following message is displayed.
Do not restart Node A. Restart only Node B as suggested by the installer.
Disable Password-based Authentication in the Primary Node
To ensure secure operation, you must disable password-based authentication so Node A only allows SSH Key-based authentication.
- Log in to Node A via SSH.
- Based on your public cloud provider, run the following commands to disable password-based authentication. Azure:
	sudo su -
mv /etc/90-cloud-init-users /etc/sudoers.d
passwd -d <username of the VM>
passwd -l <username of the VM>
AWS:
	sudo su -
mv /etc/90-cloud-init-users /etc/sudoers.d
passwd -d t128
passwd -l t128
- Reboot Node A in order for it to recognize Node B.
Validate the HA Conductor Deployment
When Node A has fully rebooted, both Node A and Node B will be synced. To validate the Conductor deployment is Highly Available, login to the Conductor CLI (pCLI) on Node A and run the command show system connectivity. If the status displays Connected, the HA setup has completed successfully.
Using the Azure Portal
This section describes the process to deploy a SSR Conductor in HA using the Azure Portal.
-
Begin with the section Deploying the Primary Node Conductor – Node A.
-
After Node A reboots, click on the name of the VM shown in the Azure Portal (Node A).
-
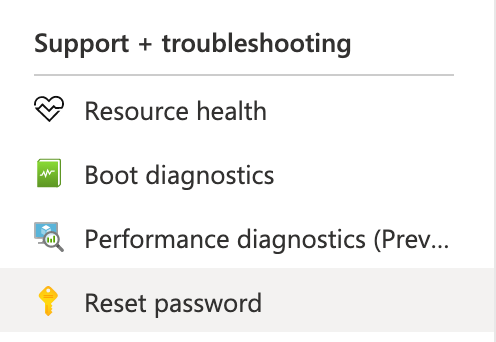
In the left menu, scroll down to the Support + troubleshooting section and select Reset password.
-
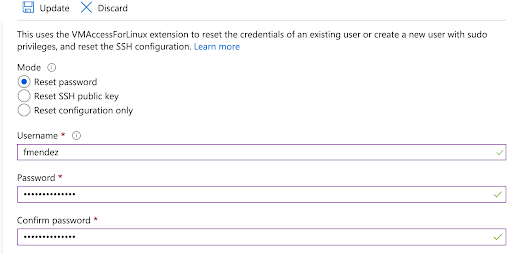
Enter the username you use to log into the VM via SSH, and enter a temporary password.
-
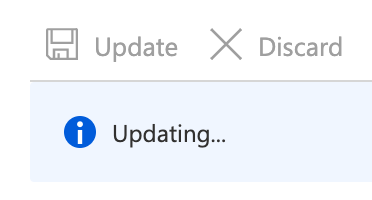
Click on Save and wait until the request to reset the password is completed.
-
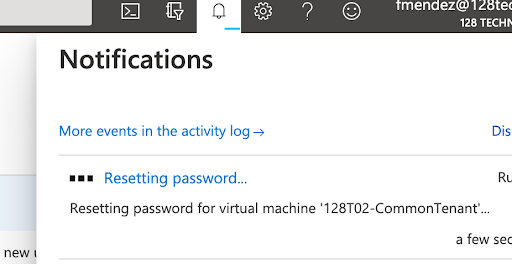
Check the list of notifications to confirm the change.
-
Perform the configuration steps in the section Deploying the Secondary Node Conductor – Node B.
-
To disable password-based authentication in the primary node of the Conductor using the Azure portal, click on the name of the VM shown in the Azure Portal (Node A).
-
In the left menu, scroll down to the Support + troubleshooting section and select Reset password.
- Select mode “reset SSH public key.”
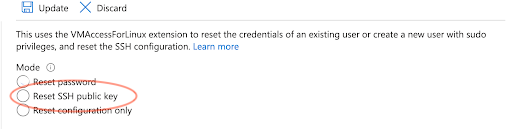
- Enter the username and paste the value of the corresponding public SSH key.
- Click on Save and verify the request to reset the SSH key in the notifications list.
To validate the Conductor has been deployed successfully, refer to the section Validate the HA Conductor Deployment.